If you need to become a translator yourself, then you must first register yourself with the Mumble server. On IPhone this task is somewhat difficult but here we will go step-by-step on how to register your user.
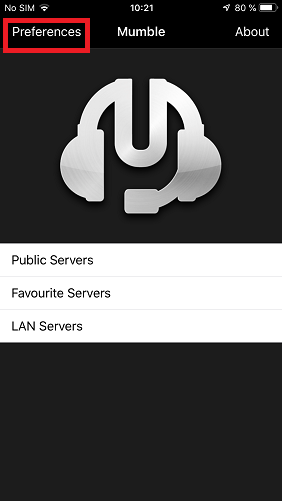
When you first start Mumble, you should see the following screen. Click on “Preferences”
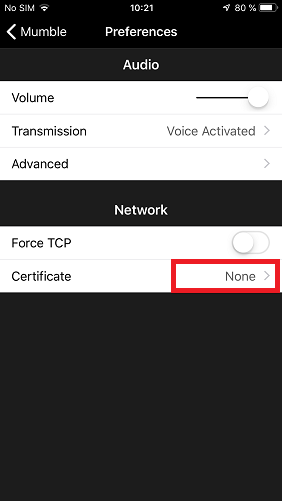
Then in the “Preferences” screen hit the “Certificate” row and specifically the “None” text
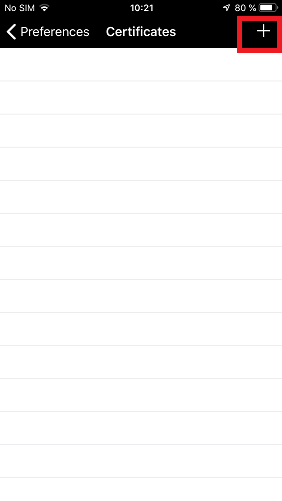
Hit the “Plus” sign to add a new certificate.
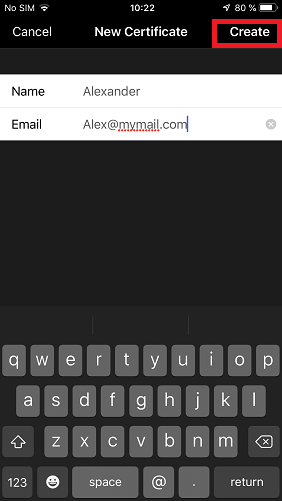
Enter your name and email. It is not extremely important what you enter here just as long as it is something nobody else tries to use. Then hit “Create”
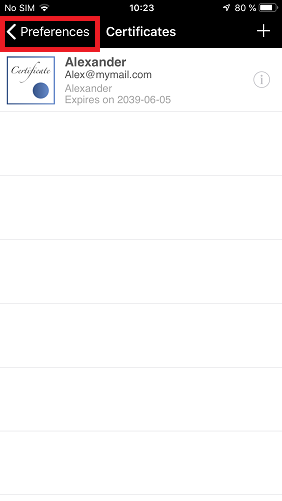
You will see the certificate you have just created. Hit the text “Preferences” to go back to the preference screen.
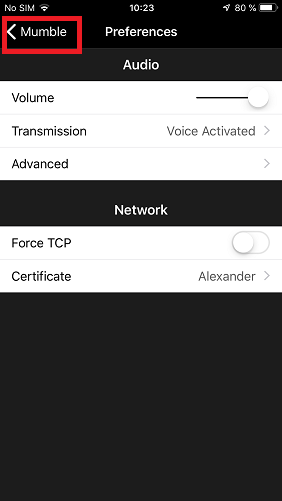
Hit the “Mumble” text to go back to the main screen.
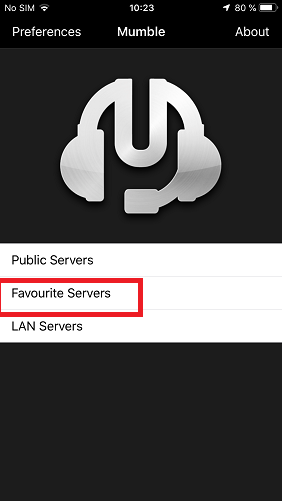
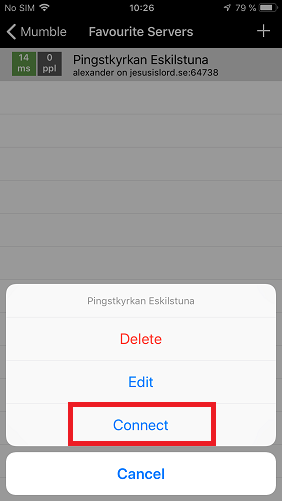
Hit your “Favourite Servers” menu to see your user to connect with.
Then click on your user and “Connect”
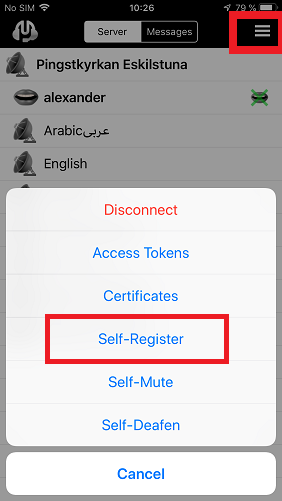
Click on the “menu” in the upper right hand corner of the screen and in the menu select “Self-Register”
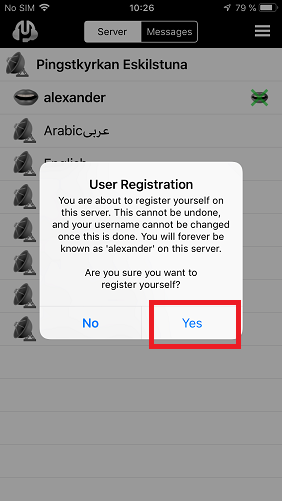
Enter “Yes” that you indeed want to register.
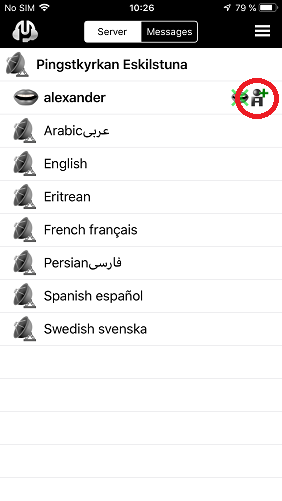
Now you are registered. You can always see that you are registered by the icon that is beside your name that is circled below.